Photographing your expertise
Great photos are one of the most important parts of your listing. This guide covers how to choose images that showcase your expertise and help guests book with confidence.
Getting started
Here are the top three things that make the biggest difference.
Show your expertise in action
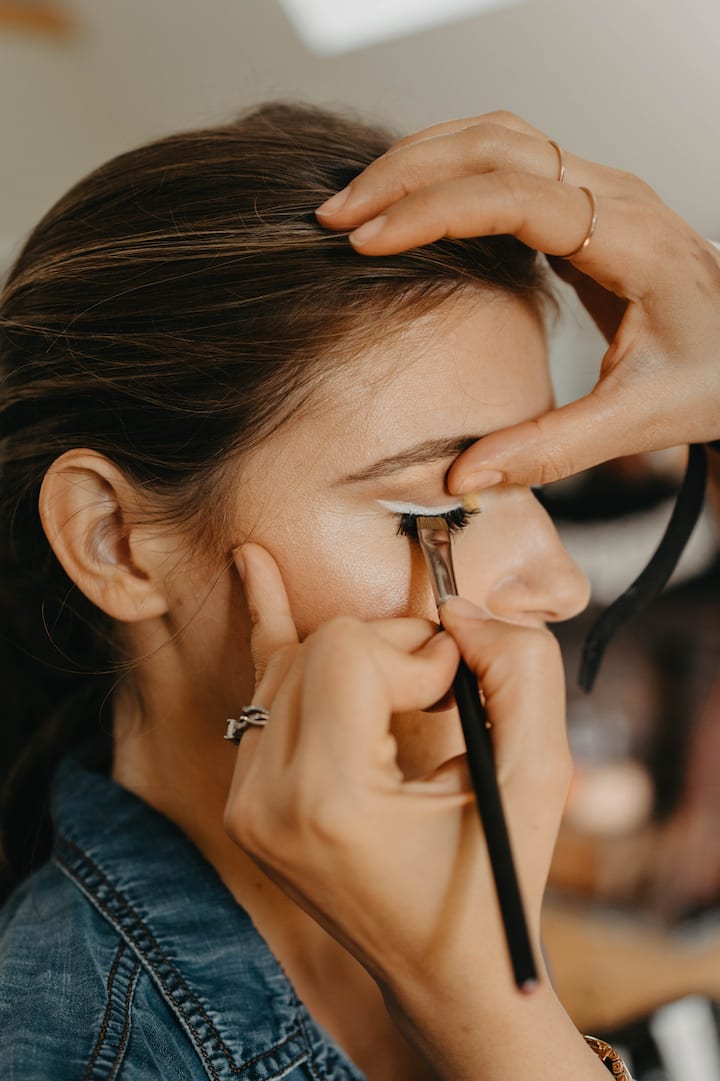
Candid, in-progress shots build more trust than posed portraits.
Keep it authentic
Real tools, real settings, real offerings — guests can tell when something is staged.
Cover the full experience
Include your offerings, your workspace, and yourself, so guests know exactly what to expect.
What we look for
- Natural light — the more available light, the better; shoot near windows when possible
- Clean, uncluttered backgrounds — simple settings keep the focus on your offering
- Centered composition — place the subject in the middle of the frame for a clear, easy read
- Variety of angles — straight-on, side, and overhead shots give guests a fuller picture
- Color, true-to-life images — no filters or heavy edits

Before the photoshoot
To ensure a successful shoot, plan the key elements in advance. Outline all the offerings you want to feature, and if a friend is photographing for you, walk them through the moments and details that matter most.

Get help
ask 1-2 friends to act as your guests in a pretend session, and have someone else photograph so you can capture real interaction and action shots.

Wardrobe
wear something authentic to your offering, and steer clear of heavy patterns or visible logos.

Lighting
choose a time of day with strong, even natural light for the clearest results, but keep it relevant to the time the experience takes place.

Location
capture where the activity actually happens, and keep the background free of clutter.
Minimum requirements
- Minimum resolution: 1024×683px or larger
- Color photos only: no black & white or heavy filters
- No stretched, tilted, or distorted images
- Sharp and well-lit — no blurry or dark photos
- No collages — submit individual images
- No text or logos overlaid on photos
Minimum requirements
- Minimum resolution: 1024×683px or larger
- Color photos only: no black & white or heavy filters
- No stretched, tilted, or distorted images
- Sharp and well-lit — no blurry or dark photos
- No collages — submit individual images
- No text or logos overlaid on photos
Selecting the best photos
Your photos appear in four places on your listing page. Here’s what each one does, so you know what you’re shooting for.

Cover photo
2-3 imagesThe first image guests see, cropped into a long horizontal strip at the top of your page.
Offerings
3-7 imagesIndividual images showing each service a guest can book, listed with prices.
Profile photo
1-2 imagesA clear, friendly portrait of you, cropped into a tight circle.
Gallery
5-10 imagesA collection of additional images that tell the full story of your service, equipment, and how you work.
Cover photo
Your cover photo is the first thing guests see, so it’s worth choosing one that entices them and clearly shows what you’re offering. Choose a beautiful, wide horizontal shot that captures the essence of your service. Note that the final crop is a long, narrow strip with navigation icons overlaid near the edges, so keep the most important subject matter centered and readable from a distance — avoid placing key details near the top, bottom, or sides of the frame. Tip: After you select your cover, look at your live listing on your phone.


Food

Fitness

Beauty
Offering & gallery photos
Show guests exactly what they can book, and how you deliver it. Offering photos are your finished result, styled and photo-ready — this is a main selling point on your page. Gallery photos show your process, tools, and the experience of working with you, so guests know what to expect.
Food
No guests neededPlan how your dishes will look both on their own and together as a spread. Set up near a window for natural light, and choose a surface that contrasts with your plates. Keep the table authentic to how you actually serve guests — skip props or extras that wouldn’t normally be there. Tip: browse food delivery apps for plating inspiration.
Offering photos


Gallery photos

Host in action

Process details

Tools & equipment

Final product
Beauty
Guests recommendedPrepare each offering so it’s 95% complete before your photoshoot starts, ensuring the finished result is ready to capture. Choose a simple backdrop, like a blank wall, so the focus stays on the finished look rather than the surroundings. Examples: glam makeup, pin-up curls, wedding updo, etc.
Offering photos


Gallery photos

Host in action

Process details

Tools & equipment

Final product
Fitness
Guests recommendedInvite the same number of guests your service is designed for — if it’s a group workout, bring a full group to the photoshoot so the energy and scale feel accurate. Be sure to bring all necessary equipment to the location, and choose a setting that matches where you’d actually host the session, whether that’s a studio, gym, or outdoor space.
Offering photos


Gallery photos

Host in action

Process details

Tools & equipment

Final product
Wellness & spa
Guests recommendedKeep your guest covered with a towel, robe, or sheet throughout the shoot, with minimal skin visible. Any contact shown should reflect the service itself — professional and therapeutic in tone. Choose a clean, simple background that keeps the focus on the treatment rather than the surroundings.
Offering photos


Wellness & spa

Host in action

Process details

Tools & equipment

Location
Profile photo
The profile photo informs potential guests of who you are, and signals warmth, professionalism, and reliability. The final photo may be cropped into a tight circle, and feature only your head, face, and neck. For this reason, a strong portrait will feature you facing the camera, making eye contact, with a warm and friendly expression. Ideal locations include spots near windows or shaded outdoor areas, where the background remains simple and uncluttered, allowing the viewer to focus on you.


